Troubleshooting Tips for Common Refrigerator Problems
Introduction
Having a functional refrigerator is essential for keeping our food fresh and safe. However, like any other appliance, refrigerators can encounter issues from time to time. In this blog post, we’ll explore some of the most common refrigerator problems and provide step-by-step troubleshooting tips to get your fridge back in top working condition.
What is the most common issue with refrigerators?
The most common issue with refrigerators is inadequate cooling or improper temperature regulation. A refrigerator failing to maintain the right temperature can lead to food spoilage and potential health risks. Understanding and addressing this problem is crucial for ensuring the longevity and efficiency of your refrigerator.
Common problems with refrigerators not cooling:
1. Dirty Condenser Coils: Dust and debris can accumulate on the condenser coils located at the back or bottom of the fridge, hindering proper heat dissipation and causing cooling problems.
2. Faulty Evaporator Fan: The evaporator fan circulates cold air throughout the refrigerator. If this fan malfunctions, the fridge may not cool uniformly.
3. Damaged Door Gasket: The rubber gasket lining the refrigerator door keeps the cold air inside. A damaged or loose gasket can lead to air leaks and insufficient cooling.
4. Defective Thermostat: The thermostat controls the refrigerator’s cooling cycle. A faulty thermostat may cause erratic temperature changes or prevent the fridge from cooling altogether.
5. Clogged or Frozen Drain Tube: A clogged or frozen drain tube can lead to water buildup in the fridge and hinder proper cooling.
What would cause a refrigerator to stop getting cold?
Several factors can cause a refrigerator to stop getting cold:
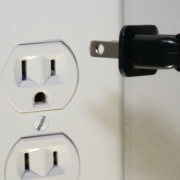
1. Power Supply Issues: Ensure the refrigerator is receiving power and that the electrical outlet is functional.
2. Compressor Problems: The compressor is the heart of the cooling system. If it’s faulty or not working correctly, the fridge won’t cool.
3. Refrigerant Leak: A refrigerant leak can significantly impact the cooling process, leading to insufficient cooling.
4. Thermistor Malfunction: The thermistor monitors the temperature and signals the compressor to start or stop. A malfunctioning thermistor can disrupt the cooling cycle.
5. Clogged Air Vents: Blocked air vents can restrict the flow of cold air, affecting the fridge’s cooling capacity.
How do I reset my refrigerator compressor?
Resetting the refrigerator compressor may help resolve certain cooling issues. Here’s a general procedure to reset the compressor:
1. Unplug the refrigerator from the electrical outlet and wait for about 5-10 minutes.
2. Plug the refrigerator back in.
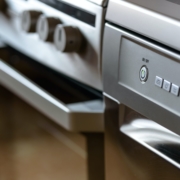
3. Locate the temperature control panel or display on your fridge (it may vary depending on the model).
4. Set the refrigerator to the desired cooling level.
5. Wait for the compressor to kick in, indicating that it’s working correctly.
It’s important to note that while a compressor reset may fix some problems, persistent cooling issues may require professional attention.
Conclusion
Refrigerator problems can be frustrating, but with the right troubleshooting tips, you can often identify and resolve the issues on your own. Remember to prioritize safety, and if you encounter complex problems or feel uncertain about troubleshooting, don’t hesitate to seek help from a qualified appliance repair technician. Regular preventive maintenance can also go a long way in keeping your refrigerator running smoothly for years to come.