How to Extend the Lifespan of Your Major Appliances

Home appliances are significant investments that make daily life easier, but they can also be costly to replace when they break down. Luckily, with proper care and maintenance, you can extend the lifespan of your major appliances and keep them running efficiently for years to come. By following a few simple tips and best practices, you can save money on repairs, reduce your energy bills, and get the most out of your appliances. In this blog post, we’ll share practical advice on how to care for your refrigerator, washing machine, dryer, dishwasher, and oven to keep them in top condition.

1. Refrigerator: Keep It Clean and Cool

Refrigerators run 24/7, so it’s essential to maintain them properly to keep them working efficiently and extend their lifespan.

– Clean the Coils: The condenser coils, located at the back or bottom of your refrigerator, play a crucial role in removing heat. Dust and dirt buildup on these coils can make the refrigerator work harder, leading to increased wear and tear. Clean the coils every six months using a vacuum or a coil brush.

– Check the Door Seals: A loose or cracked door seal can let cool air escape, causing your fridge to work overtime. Test the seal by closing the door on a dollar bill—if it slides out easily, it’s time to replace the gasket. A good seal ensures your refrigerator maintains the correct temperature without straining the motor.

– Keep It Full, but Not Overstuffed: A well-stocked refrigerator retains cold air better, but overloading it can block vents and reduce airflow, making it less efficient. Make sure there’s enough space for air to circulate freely around food items.

– Set the Right Temperature: Setting your refrigerator too cold not only wastes energy but also puts unnecessary strain on the compressor. Keep the refrigerator at 37-40°F (3-4°C) and the freezer at 0°F (-18°C) to maintain optimal performance.

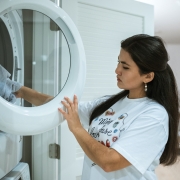
2. Washing Machine: Cleanliness and Balance Matter

Washing machines deal with heavy loads, but with the right care, they can last for many years.

– Avoid Overloading: While it may be tempting to wash large loads to save time, overloading your washing machine can strain the motor and damage the drum. Follow the manufacturer’s guidelines for load size, and try to distribute the clothes evenly in the drum to prevent imbalance.

– Use the Right Detergent: If you have a high-efficiency (HE) washer, make sure to use HE detergent. Using regular detergent in an HE washer can create excess suds, leading to longer rinse cycles and potentially damaging the machine over time.

– Clean the Drum and Filter: Mold, mildew, and detergent residue can build up inside the drum, leading to unpleasant odors and reduced efficiency. Run a cleaning cycle with vinegar or a washing machine cleaner every month. Also, clean the drain pump filter regularly to ensure proper drainage.

– Check the Hoses: Inspect the water hoses every few months for signs of wear, cracks, or leaks. Replace them every five years, even if they appear in good condition, to prevent unexpected leaks that could damage your washer and your home.

3. Dryer: Lint-Free and Well-Ventilated

Dryers are essential for laundry day, but they also require regular maintenance to stay in good shape.

– Clean the Lint Filter After Every Load: A clean lint filter improves airflow, making the dryer work more efficiently and reducing drying time. It also prevents the buildup of lint, which can pose a fire hazard if it accumulates inside the dryer.

– Clean the Dryer Vent: Over time, lint can build up in the dryer vent, reducing airflow and making the dryer work harder. Clean the dryer vent and ductwork at least once a year to ensure proper ventilation and prevent overheating. If you notice that clothes are taking longer to dry, it could be a sign that the vent needs cleaning.

– Check the Drum Seal: The seal around the dryer drum prevents warm air from escaping. If the seal is worn or damaged, it can cause the dryer to work less efficiently and increase drying times. Check the seal periodically and replace it if necessary.

– Avoid Overloading the Dryer: Similar to the washing machine, overloading the dryer can put extra strain on the motor and belt, leading to premature wear. Drying smaller loads may take a bit more time but will help keep your dryer running smoothly.

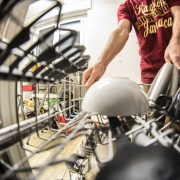
4. Dishwasher: Clean and Maintain for Better Performance

Dishwashers save time and water, but they require regular maintenance to prevent clogs and ensure a long life.

– Clean the Filter Regularly: Many modern dishwashers have a filter that traps food particles. A dirty filter can cause unpleasant odors and reduce cleaning efficiency. Clean the filter every few weeks by rinsing it under warm water and scrubbing it with a soft brush if needed.

– Run a Cleaning Cycle: Run a cycle with a dishwasher cleaner or a cup of vinegar every month to remove mineral deposits, soap scum, and food particles that can accumulate over time. This helps maintain efficiency and prevents clogs.

– Check the Spray Arms: If your dishes aren’t getting as clean as they used to, the spray arms may be clogged with food debris or mineral deposits. Remove the spray arms and clean out the holes with a toothpick or brush to restore proper water flow.

– Don’t Overload the Dishwasher: Loading too many dishes at once can block the spray arms and prevent water from reaching all the dishes. Follow the manufacturer’s recommendations for loading, and ensure that dishes aren’t blocking the detergent dispenser.

5. Oven: Keep It Clean and Well-Maintained

Your oven is the heart of the kitchen, and with proper care, it can provide many years of reliable service.

– Clean Spills Immediately: Spills and food debris can build up on the oven floor, causing smoke and unpleasant odors when you use the oven. Clean spills as soon as the oven cools down to prevent buildup. Use a soft cloth or sponge with warm, soapy water for regular cleaning.

– Use the Self-Cleaning Feature Sparingly: While the self-cleaning feature is convenient, it can put a lot of strain on the oven’s components. Use it only when necessary, and follow the manufacturer’s instructions to avoid overheating and damaging parts.

– Check the Door Seal: A tight oven door seal keeps heat inside, ensuring even cooking and energy efficiency. If you notice that your oven is taking longer to cook or isn’t holding temperature well, check the door seal for signs of wear and replace it if necessary.

– Inspect the Burners: If you have a gas stove, make sure the burners are clean and free of debris. Clogged burner holes can result in uneven flames and poor heat distribution. For electric stoves, ensure the coils are properly connected and not damaged.

Conclusion

Maintaining your major appliances doesn’t have to be complicated, but it does require a bit of regular attention. By following these simple maintenance tips, you can extend the lifespan of your refrigerator, washing machine, dryer, dishwasher, and oven. Not only will this help you avoid costly repairs and replacements, but it will also keep your appliances running efficiently, saving you money on energy bills.

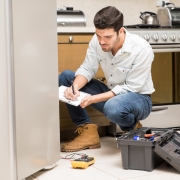
If you ever encounter a problem that seems beyond a simple fix, don’t hesitate to call in a professional appliance repair technician. They can help diagnose issues, make necessary repairs, and ensure that your appliances continue to serve you well for years to come. With a little care and attention, you can enjoy the convenience and reliability of your home appliances for a long time.

Energy-Saving Tips for Your Home Appliances

As energy costs continue to rise, finding ways to reduce your home’s energy consumption can make a big difference in your utility bills—especially during the summer months when many appliances are working overtime. From your refrigerator to your washer, dryer, and oven, there are simple steps you can take to maximize efficiency and cut down on unnecessary energy use. In this blog post, we’ll share energy-saving tips for some of the biggest energy-consuming appliances in your home: refrigerators, washers, dryers, and ovens.

1. Refrigerator: Keep It Cool and Efficient

Your refrigerator is one of the biggest energy consumers in your home since it runs 24/7 to keep your food fresh. Here are some ways to ensure it’s working as efficiently as possible:

– Set the Right Temperature: Keeping your refrigerator too cold can waste energy. Set the temperature to around 37-40°F (3-4°C) for the refrigerator and 0°F (-18°C) for the freezer. This range will keep your food safe without using more energy than necessary.
– Check the Door Seals: Over time, the seals around your refrigerator door can become worn or loose, allowing cool air to escape. Test the seal by closing the door on a piece of paper—if you can easily pull it out, the seal may need to be replaced. Tight seals help the refrigerator maintain its temperature without overworking.
– Keep It Full but Not Overloaded: A well-stocked refrigerator retains cold air better than an empty one, reducing the workload on the compressor. However, avoid overloading it, as blocking the vents can prevent air circulation and make the fridge work harder.
– Clean the Coils: Dust and dirt can accumulate on the condenser coils at the back or bottom of your refrigerator, making it less efficient. Clean these coils at least twice a year with a vacuum or a coil brush to ensure optimal performance.

2. Washer: Wash Wisely to Save Energy

Washing machines can use a significant amount of energy, especially when heating water. Here’s how to reduce energy consumption when doing laundry:

– Use Cold Water for Most Loads: Washing clothes in cold water can save a considerable amount of energy, as heating water accounts for about 90% of the energy used by a washing machine. Modern detergents are effective even in cold water, making it a great option for everyday laundry.
– Wash Full Loads: Running full loads rather than half loads maximizes the efficiency of your washing machine. If you need to wash a smaller load, adjust the water level setting to match the load size.
– Use High-Efficiency Detergent: If you have a high-efficiency (HE) washing machine, be sure to use HE detergent. This detergent is formulated to produce fewer suds, allowing the machine to operate more efficiently.
– Clean the Lint Filter and Drain Pump Filter: Just like with dryers, washing machines have filters that can become clogged with lint and debris. Clean these filters regularly to keep the machine running smoothly and efficiently.

3. Dryer: Dry Smarter, Not Harder

The dryer is another major energy user, but a few small adjustments can help it run more efficiently:

– Clean the Lint Filter After Every Load: A clogged lint filter not only poses a fire hazard but also makes your dryer work harder, using more energy to dry your clothes. Clean the filter after each use to improve airflow and drying efficiency.
– Use Dryer Balls: Adding dryer balls to your dryer can help reduce drying time by allowing more air to circulate between your clothes. This means less time and energy needed for each load.
– Dry Full Loads (But Don’t Overfill): Drying full loads saves energy compared to drying smaller loads. However, avoid overloading the dryer, as this can block airflow and lengthen drying times.
– Hang Dry When Possible: During the summer, take advantage of the warm weather by hanging clothes to dry outside. This is the most energy-efficient way to dry clothes and can help you save money on electricity.

4. Oven: Use Heat Wisely

Cooking and baking can heat up your home and drive up energy costs, especially in the summer. Here are some tips for using your oven more efficiently:

– Use the Right Sized Pots and Pans: When using the stovetop, match the size of your pots and pans to the size of the burner. Using a small pot on a large burner wastes energy. For electric stoves, a good portion of heat is lost when the pan is smaller than the burner.
– Avoid Preheating When Possible: While preheating is necessary for some recipes, it’s often not needed for casseroles, roasts, or other slow-cooking dishes. Only preheat the oven when a recipe specifically requires it.
– Cook Multiple Dishes at Once: If you’re baking multiple items, try to cook them together to reduce the number of times you need to heat up the oven. This is especially useful for meal prep.
– Keep the Door Closed: Every time you open the oven door, the temperature drops by about 25 degrees, causing the oven to use more energy to get back to the set temperature. Use the oven light to check on your food without opening the door.
– Use a Microwave or Toaster Oven for Small Meals: For small meals, using a microwave or toaster oven can be much more energy-efficient than heating up a large oven. These smaller appliances require less time and energy to reach the desired temperature.

Bonus Tips for Overall Energy Efficiency

– Install a Programmable Thermostat: Managing your home’s temperature efficiently can reduce the workload on appliances like refrigerators and freezers. A programmable thermostat can help maintain a consistent temperature, especially when you’re not at home.
– Unplug Appliances When Not in Use: Even when turned off, some appliances use standby power. Unplugging appliances like microwaves, toasters, and coffee makers when not in use can add up to noticeable energy savings over time.
– Use Fans Instead of Cranking Up the AC: Ceiling fans and portable fans can help circulate cool air, allowing you to raise your thermostat a few degrees without sacrificing comfort. This can reduce the strain on your air conditioner and lower your energy bills.

Conclusion

Cutting down on energy usage during the summer doesn’t mean sacrificing comfort or convenience. With a few simple adjustments, you can reduce the energy consumption of your refrigerator, washer, dryer, and oven—saving money and being kinder to the environment. Whether it’s cleaning filters, using appliances more strategically, or adjusting temperature settings, every small step helps.

By following these energy-saving tips, you’ll not only keep your home cooler and your utility bills lower but also extend the lifespan of your appliances, ensuring they remain efficient for years to come. If you notice any persistent issues or inefficiencies with your appliances, don’t hesitate to reach out to a professional repair technician—they can help diagnose and fix problems, making sure your appliances run at peak efficiency.

DIY vs. Professional Repair: When to Tackle Appliance Issues Yourself

In our homes, appliances work tirelessly behind the scenes, making life easier and more convenient. However, when something goes wrong, the dilemma arises: should you attempt to fix the problem yourself or call in a professional repair technician? While some issues are simple enough for a DIY approach, others require the expertise of a trained technician. In this blog post, we’ll explore when it’s appropriate to tackle appliance issues on your own and when it’s best to leave the repairs to the professionals.

 When DIY Repairs Are Safe and Feasible

There are certain appliance issues that most homeowners can handle without much risk or technical knowledge. Here are some common scenarios where a DIY fix is often appropriate:

1. Replacing a Refrigerator Water Filter

Issue:

Your refrigerator’s water filter needs replacing.

Why It’s DIY-Friendly:

Most refrigerator models are designed for easy water filter replacement. The filter is usually located in a convenient spot, and the process often involves twisting out the old filter and inserting a new one. This is a straightforward task that doesn’t require any special tools or technical expertise.

Steps:

– Turn off the water supply.

– Remove the old filter by twisting it counterclockwise.

– Insert the new filter and twist it clockwise until secure.

– Turn the water supply back on and run water through the dispenser to clear any air bubbles.


2. Cleaning the Lint Filter in Your Dryer

Issue:

Your dryer isn’t drying clothes as effectively as it used to.

Why It’s DIY-Friendly:

A clogged lint filter is a common cause of poor dryer performance. Cleaning the lint filter is a simple task that can improve your dryer’s efficiency and reduce the risk of a fire.

Steps:

– Locate the lint filter, usually found inside the door or on top of the dryer.

– Remove the filter and clean off the lint.

– Replace the filter before running the dryer.


3. Unclogging a Dishwasher Spray Arm

Issue:

Your dishwasher isn’t cleaning dishes properly.

Why It’s DIY-Friendly:

Over time, food particles and mineral deposits can clog the spray arms, reducing their effectiveness. Cleaning the spray arms is a relatively simple task that can restore your dishwasher’s performance.

Steps:

– Remove the spray arms by unscrewing or unclipping them from the dishwasher.

– Use a toothpick or small brush to clear any clogs from the spray holes.

– Rinse the arms thoroughly and reattach them.


4. Replacing a Burnt-Out Oven Light Bulb

Issue:

The light inside your oven has stopped working.

Why It’s DIY-Friendly:

Replacing an oven light bulb is similar to changing a regular light bulb and doesn’t involve handling any electrical components beyond the bulb itself.

Steps:

– Turn off the oven and allow it to cool.

– Remove the light cover inside the oven.

– Unscrew the old bulb and replace it with a new one of the same type and wattage.

– Replace the light cover.


 When to Call a Professional Repair Technician

While some appliance repairs are simple, others can be complex, dangerous, or require specialized tools and knowledge. Here are situations where it’s best to call in a professional:

1. Electrical Issues

Issue:

Your appliance has stopped working, trips the circuit breaker, or emits a burning smell.

Why It Requires a Pro:

Electrical problems can be hazardous and should never be handled by someone without proper training. Issues like faulty wiring, short circuits, or defective components can lead to electrical shocks, fires, or further damage to the appliance. A professional technician has the tools and expertise to safely diagnose and repair electrical issues.


2. Gas Appliance Repairs

Issue:

Your gas oven won’t light, or you smell gas when using the appliance.

Why It Requires a Pro:

Gas appliances can be dangerous if not handled correctly. A gas leak or malfunctioning igniter can pose serious safety risks, including fire or explosion. Professional technicians are trained to work with gas appliances and can safely make the necessary repairs while ensuring your home remains safe.

3. Refrigerant Issues in Refrigerators or Air Conditioners

Issue:

Your refrigerator or air conditioner isn’t cooling properly, and you suspect a refrigerant leak.

Why It Requires a Pro:

Handling refrigerants requires special training and certification due to environmental regulations and safety concerns. A refrigerant leak can not only harm the environment but also pose health risks if inhaled. A professional technician can safely repair leaks, recharge the system with the correct amount of refrigerant, and ensure the appliance is operating efficiently.


4. Complex Mechanical Problems

Issue:

Your washing machine isn’t spinning, or your dryer isn’t heating.

Why It Requires a Pro:

Mechanical problems, such as broken belts, faulty motors, or damaged components, often require disassembling parts of the appliance, which can be challenging without the right tools and knowledge. Attempting to fix these issues on your own can lead to further damage or even void your appliance’s warranty. A professional technician can accurately diagnose the problem and perform the necessary repairs.


5. Appliance Not Covered by Warranty

Issue:

Your appliance is still under warranty, but you’ve noticed a problem.

Why It Requires a Pro:

If your appliance is under warranty, it’s important to have it serviced by an authorized technician to avoid voiding the warranty. Attempting DIY repairs on a warranted appliance can result in losing your coverage. A professional can handle the repair while ensuring your warranty remains intact.


Conclusion

When it comes to appliance repairs, knowing when to DIY and when to call a professional is crucial for both safety and cost-effectiveness. Simple tasks like replacing filters, cleaning components, or changing light bulbs are typically safe and manageable for most homeowners. However, for more complex, electrical, or gas-related issues, it’s always best to rely on the expertise of a professional repair technician.

By understanding your own limits and the risks involved, you can make informed decisions about how to handle appliance problems, ensuring your home remains safe and your appliances continue to run efficiently. If in doubt, don’t hesitate to reach out to a trusted appliance repair service—they’re there to help you keep your household running smoothly.

Top 5 Signs It’s Time to Call an Appliance Repair Technician

Appliances are the unsung heroes of our daily lives, making everything from cooking to cleaning more convenient. However, when these trusty machines start to malfunction, it can disrupt our routines and cause frustration. While some minor issues can be fixed with a little DIY effort, others require the expertise of a professional repair technician. Knowing when to call in the pros can save you time, money, and further damage to your appliance. In this blog post, we’ll explore the top five signs that it’s time to call an appliance repair technician.

1. Strange Noises

What to Look For:

– Unusual sounds such as grinding, rattling, buzzing, or clanking that weren’t there before.

What It Could Mean:

– Strange noises are often a sign that something is wrong internally. For example, a grinding noise in your dishwasher could indicate a problem with the motor or pump. A rattling noise in your washing machine might suggest that a part is loose or that the drum is off-balance.

Why You Need a Technician:

– Ignoring these noises can lead to more severe damage, making the appliance unsafe or causing a complete breakdown. A technician can quickly diagnose the issue and make the necessary repairs, preventing further damage and extending the life of your appliance.


2. Poor Performance

What to Look For:

– Appliances not performing as efficiently as they used to, such as a fridge that isn’t keeping food cold enough, an oven that takes too long to heat up, or a dryer that leaves clothes damp after a full cycle.

What It Could Mean:

– Poor performance often points to underlying issues, such as worn-out components, blocked filters, or malfunctioning sensors. For instance, a refrigerator that isn’t cooling properly might have a problem with the compressor or evaporator coils.

Why You Need a Technician:

– When an appliance isn’t performing as it should, it often works harder to achieve the same results, leading to increased energy consumption and higher utility bills. A technician can identify and fix the root cause, restoring your appliance’s efficiency and saving you money in the long run.


3. Water Leaks

What to Look For:

– Puddles of water around your washing machine, dishwasher, or refrigerator, or signs of water damage near the appliance.

What It Could Mean:

– Water leaks can be caused by a variety of issues, such as a cracked hose, a faulty pump, or a clogged drain. In refrigerators, a leak could also indicate a problem with the defrost drain or water line.

Why You Need a Technician:

– Water leaks are more than just a nuisance—they can cause significant damage to your home, including mold growth, structural damage, and electrical hazards. A technician can quickly identify the source of the leak and make the necessary repairs to prevent further issues.


4. Electrical Issues

What to Look For:

– Appliances that won’t turn on, keep tripping the circuit breaker, or emit a burning smell when in use.

What It Could Mean:

– Electrical issues are serious and can be caused by faulty wiring, short circuits, or overheating components. A burning smell is especially concerning, as it could indicate an imminent fire risk.

Why You Need a Technician:

– Electrical problems can be dangerous and should never be ignored or handled by someone without proper training. A professional technician can safely diagnose and repair electrical issues, ensuring your appliance operates safely and efficiently.


5. Frequent Cycling or Running Constantly

What to Look For:

– Appliances like your refrigerator, air conditioner, or washing machine that cycle on and off more frequently than usual or run constantly without shutting off.

What It Could Mean:

– Frequent cycling or constant running can be a sign of a malfunctioning thermostat, sensor, or compressor. For example, a refrigerator that runs constantly may have a problem maintaining the correct temperature, often due to a faulty thermostat or leaking refrigerant.

Why You Need a Technician:

– Constant running or frequent cycling not only wastes energy but also puts unnecessary strain on the appliance’s components, leading to premature wear and tear. A technician can diagnose the problem and perform the necessary repairs to ensure your appliance operates efficiently.


 Conclusion

While it’s tempting to ignore minor issues with your appliances or try to fix them yourself, certain problems require the expertise of a professional appliance repair technician. Strange noises, poor performance, water leaks, electrical issues, and frequent cycling are all signs that your appliance needs professional attention. By addressing these issues promptly, you can prevent further damage, extend the lifespan of your appliances, and ensure they continue to operate safely and efficiently.

If you’ve noticed any of these warning signs with your appliances, don’t hesitate to contact a trusted appliance repair technician. They can diagnose the problem, provide a reliable solution, and help you get back to your daily routine with peace of mind.

Troubleshooting and Fixing Basic Issues with Your Oven

Ovens are indispensable appliances in our kitchens, but like any machine, they can occasionally run into problems. Before you call a professional, there are several basic issues you can troubleshoot and potentially fix on your own. This blog post will guide you through diagnosing and addressing common oven problems to keep your kitchen running smoothly.

 1. Oven Not Heating

Problem:

Your oven isn’t reaching the desired temperature or isn’t heating at all.

Troubleshooting Steps:

– Check the Power Supply: Ensure the oven is properly plugged in. For electric ovens, check the circuit breaker to ensure it hasn’t tripped. For gas ovens, ensure the gas supply valve is open.

– Inspect the Heating Elements: In electric ovens, look at the bake and broil elements. If they appear damaged or aren’t glowing red when turned on, they may need replacing.

– Test the Igniter (Gas Ovens): For gas ovens, the igniter should glow and ignite the gas. If it doesn’t glow or fails to light the gas, it might be defective.

Fixes:

– Replace Heating Elements: If the heating elements are damaged, you can purchase replacement parts and install them by unscrewing the old elements and attaching the new ones.

– Replace the Igniter: If the igniter is faulty, turn off the power and gas supply, then unscrew the igniter from its housing and replace it with a new one.

2. Oven Temperature is Inaccurate

Problem:

Your oven’s temperature doesn’t match the set temperature, leading to undercooked or overcooked food.

Troubleshooting Steps:

– Use an Oven Thermometer: Place an oven thermometer inside and compare the reading to the set temperature.

– Calibrate the Oven: Many ovens allow you to adjust the temperature settings through the control panel. Refer to your oven’s manual for calibration instructions.

Fixes:

– Calibrate the Temperature: Follow the manual to adjust the temperature settings. Typically, this involves holding down specific buttons on the control panel and adjusting the temperature up or down.

– Replace the Temperature Sensor: If calibration doesn’t work, the temperature sensor (or thermostat) may be faulty. Replace it by unscrewing the old sensor from the back wall of the oven and connecting the new one.

3. Oven Door Won’t Close Properly

Problem:

The oven door doesn’t close completely, allowing heat to escape and affecting cooking efficiency.

Troubleshooting Steps:

– Inspect the Door Gasket: Check the rubber or silicone gasket around the door for cracks, tears, or deformation.

– Check the Door Hinges: Inspect the hinges for damage or looseness.

Fixes:

– Replace the Door Gasket: If the gasket is damaged, remove the old one by pulling it out of its groove and pressing a new gasket into place.

– Tighten or Replace Hinges: Tighten any loose screws on the hinges. If the hinges are bent or broken, you may need to replace them. This typically involves unscrewing the door from the hinges, removing the faulty hinges, and installing new ones.

4. Oven Light Not Working

Problem:

The oven light doesn’t turn on, making it difficult to monitor your cooking.

Troubleshooting Steps:

– Check the Bulb: The most common issue is a burnt-out bulb. Unscrew the light cover and inspect the bulb.

– Inspect the Light Socket and Wiring: Ensure the socket isn’t damaged and the wiring connections are secure.

Fixes:

– Replace the Bulb: If the bulb is burnt out, replace it with a new one of the same type and wattage.

– Replace the Light Socket: If the socket is faulty, turn off the power, remove the old socket, and install a new one by connecting the wires and securing it in place.

5. Oven Self-Cleaning Function Not Working

Problem:

The self-cleaning function doesn’t start or complete its cycle.

Troubleshooting Steps:

– Check the Door Latch: The self-cleaning function won’t start if the door latch is not engaging properly.

– Inspect Control Settings: Ensure you are setting the self-cleaning cycle correctly according to the user manual.

Fixes:

– Replace the Door Latch: If the latch is broken, replace it by unscrewing the old latch and installing a new one.

– Reset the Control Panel: Sometimes, resetting the oven’s control panel can resolve issues with the self-cleaning function. Refer to your manual for reset instructions.

 When to Call a Professional

While many oven issues can be resolved with basic troubleshooting, some problems require professional expertise. If you encounter issues with the control board, gas lines, or electrical components, or if you’re unsure about any repair process, it’s best to call a certified technician for oven repair in the Bay Area. We can safely and efficiently diagnose and fix more complex problems.

By understanding and addressing these common oven issues, you can save time and money, ensuring your oven remains a reliable kitchen companion. Regular maintenance and prompt repairs can extend the lifespan of your oven and keep your culinary creations coming out perfectly every time.

The Top 5 Maintenance Tips to Extend the Lifespan of Your Appliances

Household appliances represent significant investments, so it’s essential to take proactive steps to protect and maintain them. By following a few simple maintenance tips, you can extend the lifespan of your appliances and ensure they continue to operate efficiently for years to come. In this blog post, we’ll explore the top five maintenance tips recommended by appliance experts.

  1. Clean Regularly: Regular cleaning is essential for keeping appliances in top condition. Buildup of dirt, dust, and grease can not only affect performance but also pose safety hazards. Wipe down the exteriors of appliances with a damp cloth and mild detergent to remove surface grime. For interior cleaning, follow manufacturer guidelines for specific appliances, such as running cleaning cycles for dishwashers and washing machines.
  1. Check Seals and Gaskets: Proper sealing is crucial for maintaining the efficiency of refrigerators, ovens, and dishwashers. Inspect the door seals and gaskets regularly for signs of wear or damage. Replace any worn seals promptly to prevent air leaks, which can compromise temperature control and energy efficiency. Applying a thin coat of petroleum jelly to door gaskets can help maintain flexibility and ensure a tight seal.
  1. Monitor Ventilation: Adequate ventilation is essential for appliances such as refrigerators, dryers, and ovens to prevent overheating and ensure optimal performance. Check ventilation openings regularly to ensure they are free of obstructions such as dust, lint, or debris. Clear any blockages to allow for proper airflow and prevent overheating, which can lead to premature wear and malfunction.
  1. Follow Usage Guidelines: Each appliance comes with specific usage guidelines provided by the manufacturer. Following these guidelines is essential for preventing damage and maximizing efficiency. Avoid overloading washing machines and dishwashers, as this can strain the motor and cause excessive wear. Similarly, refrain from using abrasive cleaners or sharp objects that can damage appliance surfaces and components.
  1. Schedule Regular Servicing: Regular servicing by qualified technicians is crucial for identifying and addressing potential issues before they escalate into major problems. Schedule annual maintenance checks for appliances such as refrigerators, ovens, and HVAC systems to ensure they are operating at peak efficiency. During these service appointments, technicians can inspect components, lubricate moving parts, and perform any necessary repairs or adjustments to prolong the lifespan of your appliances.


By following these maintenance tips, you can protect your investment in household appliances and enjoy reliable performance for years to come. Remember that proactive maintenance is key to preventing costly repairs and ensuring your appliances operate efficiently and safely. If you’re unsure about how to perform maintenance tasks or encounter any issues beyond your expertise, don’t hesitate to consult with a professional appliance repair technician. We are one of San Rafael’s best appliance repair companies and service all of Marin County. 

Troubleshooting Common Refrigerator Problems: Keeping Your Cool

Your refrigerator is a vital appliance in your home, tirelessly working to keep your food fresh and your beverages cold. However, like all appliances, it can encounter problems from time to time. In this blog post, we’ll discuss some common refrigerator problems and provide troubleshooting steps to help you identify and possibly resolve these issues without the need for professional assistance.

1. Refrigerator Isn’t Cooling Properly:

Possible Causes:

– Dirty condenser coils.

– Blocked air vents.

– Damaged door gaskets.

– Temperature settings.

Troubleshooting Steps:

– Unplug the refrigerator and vacuum the condenser coils on the back or underneath. This improves cooling efficiency.

– Ensure the air vents inside the fridge and freezer are not obstructed by food items.

– Check the condition of the door gaskets. Replace if they are worn or damaged.

– Verify that the temperature settings are appropriately adjusted.

2. Leaking Water Inside or Outside the Fridge:

Possible Causes:

– Clogged defrost drain.

– Damaged or loose water supply line.

– Defective ice maker.

– Temperature settings.

Troubleshooting Steps:

– If water is pooling inside the fridge, inspect and clear the defrost drain, usually located at the back or bottom of the freezer.

– Check the water supply line for leaks or loose connections.

– Examine the ice maker for any visible issues. Replace the ice maker unit if necessary.

– Confirm that the refrigerator’s temperature settings are correctly set, as excess humidity can lead to condensation.

3. Unusual Noises:

Possible Causes:

– Noisy evaporator fan.

– Loose components.

– Clogged or frozen defrost drain.

Troubleshooting Steps:

– Locate the source of the noise, which may require removing the rear or bottom panel.

– If it’s the evaporator fan, try cleaning or replacing it.

– Tighten any loose components or screws.

– For unusual sounds due to a clogged or frozen defrost drain, consult the owner’s manual for specific instructions on addressing the issue.

4. Ice Buildup in Freezer:

Possible Causes:

– Blocked vents.

– Faulty defrost system.

– Poor door sealing.

Troubleshooting Steps:

– Ensure there are no obstructions blocking the vents inside the freezer.

– Inspect the defrost system, including the defrost timer, heater, and thermostat, for any defects. Replace if necessary.

– Check the integrity of the door gaskets. If they are not sealing properly, replace them.

5. Fridge is Running Constantly:

Possible Causes:

– Dirty condenser coils.

– Blocked vents.

– Excessive warm food added to the refrigerator.

Troubleshooting Steps:

– Clean the condenser coils and ensure they have proper airflow.

– Make sure there are no obstructions blocking the vents.

– Allow warm food items to cool to room temperature before placing them in the refrigerator to reduce the load on the appliance.

6. Ice Maker Not Producing Ice:

Possible Causes:

– Water supply issues.

– Faulty water inlet valve.

– Ice maker switch or sensor problems.

Troubleshooting Steps:

– Verify that the water supply is connected and turned on.

– Check the water inlet valve for any clogs or malfunctions.

– Consult the refrigerator’s manual to diagnose and fix ice maker switch or sensor problems.

7. Fridge Door Not Sealing Properly:

Possible Causes:

– Dirty or damaged door gaskets.

– Misaligned door.

Troubleshooting Steps:

– Clean the gaskets with warm, soapy water, and check for tears or deformities. Replace if necessary.

– Adjust the door alignment to ensure a proper seal. This may require tightening or loosening door screws.

By following these troubleshooting steps for common refrigerator problems, you can often identify and potentially resolve issues without the need for professional repair. However, if you encounter problems that are beyond your expertise or the issues persist, it’s best to consult a professional appliance repair technician to ensure your fridge remains in good working order.

Winter Appliance Maintenance: Keep Your Appliances Running Smoothly

Winter is not just a season of cozy nights by the fire; it’s also a time when your appliances need some extra TLC to cope with the cold. Cold temperatures, increased energy consumption, and holiday cooking can all take a toll on your appliances. In this blog post, we’ll discuss essential winter maintenance tips for your refrigerator, freezer, washer, dryer, dishwasher, oven, and cooktop to ensure they stay in tip-top shape throughout the chillier months.

1. Refrigerator and Freezer:

a. Check Temperature Settings: Lower the temperature settings slightly in winter to account for warmer ambient temperatures in your home.

b. Vacuum the Coils: Dust and dirt on the condenser coils can reduce efficiency. Vacuum them to maintain proper cooling.

c. Inspect Door Seals: Ensure the seals on your refrigerator and freezer doors are intact and provide a tight seal to prevent cold air loss.

2. Washer and Dryer:

a. Inspect Hoses: Examine the water supply hoses for your washing machine for signs of wear, and replace if necessary.

b. Clean Lint Traps: In winter, your dryer works harder. Clean the lint trap before every load to prevent overworking your dryer.

c. Inspect Dryer Vent: Ensure the dryer vent is clear of lint buildup to reduce the risk of fire and improve dryer efficiency.

3. Dishwasher:

a. Clean the Filter: Remove and clean the dishwasher filter regularly to maintain optimal water flow and washing performance.

b. Run Hot Water First: Before starting the dishwasher, run hot water in your kitchen sink to ensure the water is hot from the beginning.

4. Oven and Cooktop:

a. Check for Leaks: If you have a gas oven or cooktop, check for gas leaks. You should contact a professional for assistance if you smell gas.

b. Clean Burners and Drip Pans: Clean burners and drip pans to prevent uneven heating and potential fire hazards.

5. General Tips for All Appliances:

a. Keep Appliances Warm: Avoid placing appliances in unheated areas like garages. Colder temperatures can strain the appliance and reduce efficiency.

b. Maintain a Steady Temperature: Fluctuations in temperature can affect appliance performance. Keep your home at a consistent temperature to avoid overworking your appliances.

c. Consider Insulation: For refrigerators and freezers kept in garages or other cold areas, consider insulating them to help them maintain the right temperature.

d. Replace Worn Parts: Winter is a good time to check appliances for worn-out or damaged parts, like gaskets or seals, and replace them as needed.

e. Energy-Efficient Appliances: Consider upgrading to energy-efficient appliances, as they are often better at maintaining consistent temperatures and can save you money in the long run.

Proper winter maintenance for your appliances is essential for their longevity and efficiency. By following these tips, you can reduce energy consumption, prevent unexpected breakdowns, and ensure your appliances are ready to handle the demands of winter, from holiday cooking to extra laundry loads. A little care now can go a long way in extending the life of your valuable appliances.

Dryer Safety Tips and Maintenance: Preventing Fire Hazards

Your trusty dryer is a true workhorse, making laundry day a breeze. However, like all appliances, it requires proper care and attention to ensure safety and optimal performance.

Dryer fires are more common than you might think, and they can be devastating. In this blog post, we’ll share crucial dryer safety tips and maintenance guidelines to help you reduce the risk of fire hazards and keep your dryer running smoothly.

  1. Regularly Clean the Lint Filter:

Before each load, remove and clean the lint filter. Lint buildup can obstruct airflow, causing your dryer to overheat.

  1. Clean the Dryer Vent Pipe:

Periodically, disconnect the dryer from the wall and clean the vent pipe thoroughly. This is where lint and debris often accumulate, posing a fire risk.

  1. Inspect the Vent Hood:

Check the vent hood outside your home. Ensure it opens and closes properly and is free of obstructions like bird nests or debris.

  1. Avoid Overloading the Dryer:

Overloading the dryer can lead to overheating and longer drying times. Follow the manufacturer’s guidelines for load size.

  1. Use Rigid or Semi-Rigid Venting Material:

Flexible venting material can trap lint more easily. Opt for rigid or semi-rigid venting to reduce lint buildup.

  1. Ensure Proper Installation:

Make sure your dryer is installed correctly, with the venting system set up according to local building codes and manufacturer instructions.

  1. No Flammable Materials:

Never put items like rubber, foam, or plastic in the dryer, as they can ignite at high temperatures.

  1. Stay Home While Drying:

Avoid leaving the house while the dryer is running. If a fire were to start, you’d want to respond quickly.

  1. Regular Professional Maintenance:

Schedule an annual professional inspection of your dryer and venting system. A technician can identify and address potential issues.

10. Replace Old or Damaged Components:

If you notice signs of wear, damage, or malfunction, such as frayed cords or strange noises, replace or repair the parts promptly.

11. Keep the Area Around the Dryer Clear:

Store flammable materials, like cleaning supplies, away from the dryer to reduce the risk of fire spreading.

12. Install a Smoke Detector Nearby:

Place a smoke detector in the laundry room or near the dryer to provide an early warning in case of a fire.

13. Teach Family Members Dryer Safety:

Ensure everyone in your household understands the importance of dryer safety and knows how to respond in case of an emergency.

By following these dryer safety tips and performing regular maintenance, you can greatly reduce the risk of dryer-related fires and keep your appliance running smoothly. Remember, safety should always be a top priority when using any household appliance, and a little preventative care can go a long way in protecting your home and family.

10 Essential Dishwasher Tips for Sparkling Clean Dishes

A dishwasher is a modern marvel that saves us time and effort when it comes to cleaning dishes. However, to ensure its optimal performance and get those dishes sparkling clean, there are a few tips and tricks that can make a significant difference. In this blog post, we’ll share ten essential dishwasher tips that will help you achieve consistently excellent results while prolonging the life of your appliance.

Scrape Off Excess Food: Before loading your dishes, it’s important to scrape off large food particles. While dishwashers are designed to handle some food residue, excessive chunks can clog filters and compromise the washing process.

Proper Loading: Arrange your dishes strategically for optimal water circulation. Place larger and dirtier items like pots and pans along the sides or in the back, and ensure that smaller items are securely positioned in the racks.

Avoid Overcrowding: While it might be tempting to cram in as many dishes as possible, overcrowding can prevent water and detergent from reaching every surface. This can lead to uneven cleaning results.

Use the Right Detergent: Choose a high-quality dishwasher detergent that’s compatible with your dishwasher model. Be cautious with the amount; using more detergent than necessary doesn’t necessarily lead to cleaner dishes and might leave behind residue.

Check Water Temperature: Make sure your dishwasher is set to use hot water. Hot water is essential for effectively dissolving grease and food particles and ensuring a thorough cleaning cycle.

Prefer Energy-Saving Mode: Many modern dishwashers offer an energy-saving mode. This extends the cycle time but uses less water and energy. It’s a great option for lightly soiled dishes and can help reduce utility bills.

Utilize Rinse Aid: Rinse aid helps to prevent water spots and ensures that your dishes dry properly. It’s especially useful for glassware and plastic items prone to spotting.

Maintain Filters: Regularly clean and maintain the dishwasher’s filters. These filters capture food particles and debris, and if they’re clogged, they can hinder the cleaning process. Consult your dishwasher’s manual for guidance on how to clean the filters.

Clean the Interior: Give the interior of your dishwasher a thorough clean every once in a while. Wipe down the walls, racks, and door gasket to remove any accumulated grime or detergent buildup.

Regular Maintenance: Every few months, run an empty dishwasher cycle with a dishwasher cleaner. This helps to remove any lingering odors, mineral deposits, and buildup from the interior of the appliance.

With these ten essential dishwasher tips, you’re well-equipped to keep your dishes consistently spotless and your dishwasher performing at its best. Remember that proper loading, maintenance, and using the right detergents are key factors in achieving sparkling results. By incorporating these tips into your dishwashing routine, you’ll not only save time and energy but also enjoy the convenience of beautifully clean dishes after every cycle.