Top Reasons Why Your Dryer Takes Too Long to Dry

Top Reasons Why Your Dryer Takes Too Long to Dry

It’s frustrating doing laundry when everything goes according to plan, but it’s even worse when you go to your dryer to pull your clothes out, reach in, and they’re still damp after an hour.


What’s going on?

There are some reasons you can troubleshoot to determine why your dryer is taking forever to do its job; we’ll go over some of those and discuss how to correct them. Keep in mind that if you don’t feel comfortable doing any troubleshooting on your own, Absolute Appliances Repair can help with your dryer repair. Here are some troubleshooting tips:


Incorrect Power Issues

Always start by checking the dryer’s power source. Electric dryers have to have a 240 volt outlet in order to receive enough power to operate properly (and dry thoroughly). Gas dryers can use a standard 120 volt outlet, but they do also require a proper gas line connection to receive enough power to perform. NEVER use an extension cord to power your dryer, regardless whether it’s electric or gas! They cannot safely provide the required voltage a dryer needs. If your machine is properly plugged into the appropriate voltage outlet, contact an appliance repair company in San Francisco to assess the gas connection for a gas dryer.


A Washing Machine Issue

Sometimes, a dryer isn’t able to properly dry clothing at no fault of its own. Is your washing machine properly spinning the load to extract enough water from your clothing? If you put clothing in the dryer that is literally dripping wet, your dryer is going to work really hard trying to dry it all, and won’t be able to do it in one cycle. Check to make sure the spin cycle on your washer is up to par.


Jammed Exhaust Vent

This is a pretty common cause of dryers not meeting our drying expectations! An expert in Marin County appliance repair could tell you horror stories about things that can clog dryer exhaust vents! These vents can get clogged with lint over time, even if you diligently clean the lint trap. Vent hoses can also become kinked or come loose from the wall, too. You’ll need to get behind your dryer and inspect the vent and straighten any kinks. It should be positioned at a 45 degree angle to ensure adequate airflow. Use a soft nylon brush or even a vacuum hose to remove lint from the area and to get rid of lint and debris where the venting attaches to the hood, too. Take the venting off and visually make sure nothing is blocking that air flow.


Way Too Much Clothing

Probably the most common cause of dryers not being able to dry in one cycle is overloading. If too much clothing is in there, hot air isn’t going to be able to properly circulate, making a cycle turn into a half day’s worth of work. Your manual should have instructions on the exact capacity of your specific model. You’d be surprised at how much having just a couple of extra pieces of clothing can make a difference with drying times!


Check Your Cycle Selection

Another common reason for dryer disappointment is that an incorrect cycle has been selected. It’s easy to forget that you changed the cycle for a previous load and forgot to change it back. Many machines today have an eco-friendly setting that uses less heat to dry, which can result in clothes that are still damp at the end of the cycle. If you never changed the dryer setting, check it anyway – you never know if someone else in the household might have.


If you’ve gone through troubleshooting your dryer and it still isn’t drying, you’ll likely need an appliance repair pro to come and take a look. Absolute Appliances Repair is certified to service all of the most popular makes and models of dryers, and we provide appliance repair for dryers, washers, dishwashers, ovens, stoves, freezers, refrigerators, and more. Contact us today – we serve residents of Marin County, Mill Valley, San Rafael, San Francisco, Larkspur, Novato, and the surrounding areas.

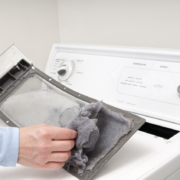
Cleaning Lint Trap

Tips for Keeping Your Dryer Running at Peak Performance

Appliances notoriously are almost always pricey investments, and a good dryer is no exception these days. Of course, you want your investments to last as long as possible in order to avoid costly appliance repair visits and replacement issues too soon. However, what many people fail to realize is that in order to accomplish this, they’re going to have to be diligent with the preventive maintenance on those appliances.

Avoid Unnecessary Appliance Repair

Having to place a service call for a dryer that isn’t working can become costly – especially if it’s a progressive problem that could’ve been avoided had the original smaller issue not been left ignored. This is why it’s always better – and most often cheaper – to not only address minor problems early, but also to make sure regular preventative maintenance is done on your machine.

The regular maintenance will allow the discovery of minor problems that may not be obvious before they become expensive bigger issues. A dryer is a machine that is simple in concept: the cylinder holding your clothes starts rotating, and air is heated is blow into it to dry clothes. The hot air is evacuated via the exhaust pipe. However, when any part of this system becomes compromised, that’s when the trouble starts. The trick is to prevent that compromise from happening in the first place.

Avoid Appliance Fires with Your Dryer

If there’s anything you can do to really keep your dryer in shape – and this is a simple (free!) maintenance tip, is to clean the lint trap after every cycle. The importance of this cannot be overstated. Accumulation of too much lint in the trap can not only cause your dryer to overheat, but it can also cause the lint to catch fire! Another simple maintenance task to keep up with is to check the exhaust pipes and the area around your machine every so often and vacuum the lint and dust and debris that falls there.

Overload can Cost You a Payload

Another common issue that experts in appliance repair in San Francisco see is overloading – trying to stuff as many items into a dryer at once as possible. Not only can overloading prevent the dryer from drying clothes properly, but it can also damage the mechanism that controls drum rotation. Once the mechanism on the rotating drum breaks, you’ll still get hot air, but without the tumbling effect, clothes won’t dry, and a service call will be needed.

Eventually, no matter how much maintenance has been performed and regardless of how diligently you’ve emptied the lint trap, your appliance may need a service call. When that time comes, it’s best to contact our experts for dryer repair in the areas of Mill Valley, San Rafael, Novato, Larkspur, and all of Marin County for help.

We have over 15 years of experience with San Francisco appliance repair, and our technicians are licensed, bonded, and insured. If you have an issue with your dryer, washer, dishwasher, refrigerator, range, or any other appliance, we can help!

Dishwasher_disassembly_08

DIY Dishwasher Repair Tips

There are plenty of ways your dishwasher can cause headaches for you, no matter how old it is or how much you paid for it. While it’s true that for most of the time it’s in your home, your dishwasher works just fine, but there are many things that come into play – everyday things – that can shorten the life of your appliance and cause you some grief.

When you do notice that your dishwasher isn’t performing as it should, you can check a few things yourself before calling for appliance repair in San Francisco. Doing so could save you some time and money, so it would be worth the effort to at least rule out any possible DIY dishwasher repairs before giving us a call!

Dishwasher Isn’t Draining

One of the most common calls we get from folks looking for dishwasher repair has to do with clogged drains. This is often the case when the dishwasher either won’t drain or it overfills – or both! Even though the drainage system in this type of appliance is intentionally complex to prevent this issue, sometimes a piece of food or another object can get stuck in the drain hose after getting through the filter. Fortunately, this can be an easy DIY dishwasher repair. Your hose could also just be kinked; if it’s hooked up to a garage disposal, check to ensure that the knockout has been removed from the disposal inlet.

Take off the lower panel that is between the door and your kitchen floor, and you’ll find the drain hose near the pump, just below the lower spray arm. There is a clamp holding the hose in place; disconnect the hose by removing that clamp and remove any obstructions you see in the hose. You might find that pouring some water through the hose can help clear debris. Reconnect the hose with the clamp and replace that bottom panel.

If your hose isn’t clogged, check the filter at the bottom of the dishwasher to see if debris is blocking water’s ability to flow through there.

Dishwasher is Leaking

This issue has a few different causes, but it would still be beneficial for DIY people to try to diagnose and fix the issue if they want to save time and money. Sometimes that same drain hose that can get clogged also cracks, splits, or becomes faulty after extended use. You can find the specific type of hose for your model online, or contact our Bay Area dishwasher repair experts for help. Once you have your new hose, disconnect the old one from the pump and switch it out with the new one, securing it with the clamps.

Always make sure you use the right type of detergent for your dishwasher and if you have hard water, you’ll want to use more detergent than you would with soft water. Check the seal around the door and make sure there are no tears or cracks. If there are, you can replace the seal with a new one or contact us to help out.

The Dishwasher Won’t Fill

If you notice that your dishes are coming out looking exactly like they did when they went in, chances are pretty good that water isn’t reaching your appliance. Be sure that the door is able to properly latch; if it isn’t, dishwashers are designed not to run for safety reasons. Make sure no one shut the water supply to it off, and check the circuit breaker or fuse box. Make sure the inlet hose is free of sediment, residue, and kinks, especially if you have water that is hard or has an excess of iron or calcium.

Detergent Lid Doesn’t Open

Have you ever gone to your appliance and noticed that the detergent cup never opened during the cycle? This is often caused by build-up of soap in the cup, and the repeated soapy residue getting wet during a cycle, then drying, then more residue layers on and dries, over and over. This issue also usually results in your detergent cup not emptying during cycles, leaving a mess in there and dishes that aren’t clean. Every so often, wipe out the detergent cup completely, making sure to remove any dried residue along its edges. We also recommend using liquid detergent – not powder. Liquid rinses better and has less build-up, which also means your dishes will look cleaner.

The Dishwasher is Suddenly Noisy

Some sounds are normal, some are due to trivial things, and others can signal a problem that an appliance repair expert in Marin County should fix. Water valves hiss during filling, they gurgle and hum while they drain, some timers make an audible clicking noise, and an arm may occasionally cause a rhythmic bumping noise if tall dishes are in its way as it rotates. You really need only be concerned if what you hear is a noise that you haven’t heard before that cannot be attributed to any of the aforementioned causes. In addition, if what you hear sounds forceful, something sounds “stuck” and you don’t hear water, or you just aren’t sure where it’s coming from, be sure to contact us for help.


Appliance repair can be tricky for anyone, so if you don’t feel comfortable trying to do it yourself, or if you’ve attempted DIY dishwasher repair but cannot fix the problem, don’t hesitate to contact us. Call us to schedule a time for us to come out and make sure your repairs are done safely and properly.

dyer-image

Troubleshooting Tips for When Your Dryer Won’t Start

Try a Little Self Repair for Dryers

Have you ever been in a situation where you needed to do laundry, and when the time came to dry your clothes the dryer wouldn’t start? This issue happens more often than people would like, but it doesn’t always automatically mean that the dryer is “broken”. There are certain things you can do to check if your dryer will not start.

The Power Source

One of the most common issues with a dryer not starting has nothing to do with the actual dryer itself, but instead the power source. If you have checked and confirmed that the dryer is plugged in, the next step is to check your circuit breaker. If you have an electrical dryer it will have two breakers that are clipped together, and if your dryer is gas it will only have one breaker. If you are not sure if it is tripped, it is always a safe bet to turn the breaker off and on.

Faulty Electronic Control Board

This troubleshooting tip only applies to dryers with a dial timer. If your push-to-start switch is broken, it can be the reason your dryer is not starting. You can check the continuity through the switch by using a multimeter, and if there is no continuity going through the switch, replacing it may do the trick. Although there are ways and means for you to do this at home, it is always better to have a professional service the machine for safety purposes.

Faulty Circuit Board

If you have an electrical dryer, there is a circuit board inside that controls the dryer’s components. If the circuit board is broken or faulty, there is a good chance that is the reason the dryer will not start. After unplugging the dryer, check the main control panel for the circuit board. If it is a faulty circuit board, contact your local appliance repair professional for the fix.

The Door

If the door on a dryer is not properly closed all the way, it will prevent the dryer from starting.  Close the dryer completely and press against the door gently to ensure it is closed. If it does not start, open the door and press in the door switch lever. If the dryer light remains on, it means that the door switch is broken.

Blown Thermal Fuse

Electrical dryers will not start if a thermal fuse is blown. Unplug the dryer and check the blower housing to find the thermal fuse. If there is no continuity coming from the thermal fuse, you will need to replace it. To prevent future fuses being blown, double check the exhaust vent for a clog. If air is unable to circulate properly, the dryer won’t run and it could cause serious damage to the appliance or even start a fire in your home.

To make sure your dryer has as few issues as possible, make sure to service the machine regularly. Clear the lint trap, make sure the vents are not blocked or clogged, and if there is something wrong with the machine that is not readily apparent, contact a professional.

For more information about what to do if your dryer won’t start, or if you have any questions, contact us today.

clean-cleaning-funny-2371-1024×683

How a Dryer Can Damage Your Clothes

If you’ve ever noticed that, over time, some of your clothes don’t look or fit like they used to, it’s not your imagination. There’s substantial scientific evidence that supports the idea that drying clothes in a dryer does irreparable damage to them. Dryers are at fault for clothes that shrink, clothes that lose their color, and clothes that wear thin and tear. To get to the bottom of just how our dryers are damaging our clothes, we’ll take a look at the studies that have been done on the matter. However, it’s important to remember that if you notice anything wrong with your appliances that point to a possible malfunction, you’ll want to contact us so we can come out and take a look to perform washer or dryer repair if needed.

The Incredible Shrinking Clothes

Researchers have taken pieces of cotton/synthetic and cotton fibers, along with blended fabrics, and marked different areas on the pieces. Then, they measured the distances and angles between each mark that was made. Putting the pieces of fabric through various washes was done, followed by either a high-heat cycle, a low-heat cycle, or air drying. You can perhaps guess how each turned out.

The experiment revealed some knowledge that most people already were aware of, like the fact that drying shrinks clothing almost twice as much as washing, and further, that tumble-drying shrinks twice as much as air-drying does. However, some new interesting facts about dryers were revealed, too:

  • When washing or tumble-drying is concerned, temperature does not actually affect the amount of shrinkage of clothes as much as most people think.
  • The hot water cycle for the washing machine shrank clothes just as much as the cold-water cycle.
  • The low-heat tumble-dry cycle shrank fabric just as much as the high-heat dry cycle.
  • What actually shrinks clothes most in a washer is the mechanical agitation.
  • What actually shrinks clothes most in the dryer is the forced air.

What About Fading Colors?

Tests on color were also performed; researchers found that most dyes don’t start to become compromised until around 340 degrees Fahrenheit, which is far hotter than any dryer should ever get. (If you have a dryer that ever gets this hot, you need to call us for repairs right away!) Therefore, dryers probably don’t cause colors to run.

Although colors don’t fade from dryers, the fabric itself does undergo some “running” of its own. Microscopic damage occurs each time fabric is put in the dryer. Although the damage itself is hard to see on clothing, all you have to do is check the lint trap to see it. Lint is what results from tiny tears in the fabric of clothing; over time, these tears cause clothes to fall apart.

How Do Dryers Contribute to Wear and Tear?

Researchers used cotton towels and rinsed them in a washing machine; then, they dried them in a dryer on high heat (about 150 degrees Fahrenheit), and then without heat. They did this for 20 cycles, and reported the results: After only 20 cycles, the fabric had already lost 50% of its strength! So after only 20 washes and dry cycles, the fabric became twice as easy to tear.

But what about dry cycles with no heat? The fabrics became 24% weaker after 20 cycles. To make matters worse, no matter what temperature is used for dry cycles, the tensile strength doesn’t level out over time; in other words, clothing damage doesn’t ever “slow down”, so each cycle pushes your clothes closer and closer to total ruin.

What Can You Do to Help Avoid Premature Damage?

Dryers save everyone valuable time and give a great deal of convenience to our daily chore schedules – but at a cost. While all dryers damage clothes, no matter the cycle, hot tumble-drying in particular takes a big toll on fabric. If you want to strike a balance between convenience and limiting the damage your clothes endure from the dryer, you should only use short dryer cycle times and low heat; the idea is to minimize mechanical action and exposing your clothing to the heat.

For more information on the best dryers for your clothes, the latest energy-efficient models, and more tips on how you can maximize the life of your clothes (and your dryer), contact our experts today – we can help with everything from tips and suggestions to maintenance to repairs.

Citations: Textile Research Journal, 2000, Vol. 70(8), pp. 739-743 Klausinger, S. L. et al., AATCC Review, 2012, pp. 51-57;

When to Repair Vs. Replace Your Large Home Appliances

How to Spend Your Money Wisely When Repairing or Replacing Appliances

Large home appliances are some of the most expensive items to a person’s name, right behind their car and the deed to their house. But many homeowners don’t spend much time thinking about or caring for their appliances until the damage has already been done. Suddenly, the refrigerator or the oven stops working, and the person has no idea whether they should repair or replace one of the biggest items in their home. This is a common dilemma for many homeowners. A person can save a lot of money when dealing with a broken appliance if they’re willing to do some homework.

Know the Life the Appliance

When dealing with a broken appliance, it’s important to understand the lifespan of the item. This will tell the person how much longer their appliance will last and whether or not it’s worth spending the money to have it repaired. The National Association of Homeowners recommends using these numbers as a reference:

  • Air conditioner: 15 years.
  • Dishwasher: 9 years.
  • Dryer: 13 years.
  • Garbage disposal: 12 years.
  • Refrigerator: 13 years.
  • Stove: 13 to 15 years.
  • Washer: 10 years.

These numbers can vary a bit based on the brand and whether the appliance has been well maintained over the years. If an appliance is getting towards the end of its lifespan, it’s probably best to have it replaced.

Check Your Warranty

Homeowners should also take the time to check their warranty information. If the appliance is still covered by the warranty, the person should have it repaired while they still can. Most manufacturers offer long-term warranties, so there’s a good chance that the item is still protected. Homeowners should also get in the habit of keeping a copy of their warranties in a safe place.

Consider Your Current Financial Situation

If the appliance isn’t covered by a warranty, the homeowner should contact an appliance repair company in their area to get an estimate. If the repairs will cost around 50% of the item’s total cost, it’s best to start from scratch and buy a new one.

If the person doesn’t have a lot of money when their appliance breaks down, they might have to have it repaired just to get by in the short-term. It all depends on what the person can afford. It usually makes more financial sense to replace the broken item sooner rather than later instead of spending money on intermittent repairs over the next several years.

Those looking for a company that provides appliance repair in Marin should contact Absolute Appliances Repair for the best customer service in town!


The Benefits of Luxury High-End Appliances

The possibilities when it comes to integrating convenience and appliances in today’s tech-savvy world cannot be overstated. These days, the finest ovens take cooking commands from smartphones and the top-of-the-line refrigerators can text you to pick up a dozen eggs. Every so often, manufacturers entice buyers with all kinds of new features and options for luxury kitchen appliances – some prove to be valuable and others – well, not so much. It might be hard to imagine life without your self-cleaning oven, but what about the refrigerator that has a television installed in its door?

Luxury Appliances for All Generations

Some of the most popular new appliances are those that have features that make life a little more convenient for more than one generation. Today’s modern family often includes people spanning at least a couple of generations, and oftentimes up to three.

For example, Bosch Appliances brand manager, Micaela Shaw, says that the company’s new best-sellers have features and designs that consider young hands, aging eyes, and middle-aged backs. Many control panels have larger numbers and letters that are easy to see, one of its dishwashers shines a light on the floor to relay the current status of the appliance, and one of Bosch’s ovens has a side door that eliminates the need to bend over a door to pull out that Thanksgiving turkey.

Another benefit of many luxury kitchen appliances is their smaller sizes; BlueStar features a 24” oven that easily fits into tiny spaces (perfect for the adult child or in-laws in the attached suite at home) and Blomberg offers a refrigerator/freezer that, at just 22” wide, fits easily into small kitchens.

The Wireless Revolution Comes to Luxury Appliances

“Smart” appliances that interact with you in new ways are rapidly infiltrating the scene, and they include everything from refrigerators that tell you when you are running out of an item to ranges that remind you to turn them off or clean them. Manufacturers seem to be moving along with the idea that people want to be able to connect with their appliances for everything – anything that offers a glimmer of the possibility of more convenience.

Nowadays you can find refrigerators with several different doors, freezers with compartments that offer individual temperature controls, fridges that let you re-order items right from their screens, dishwashers with new bottle-washing jets built right into their top racks, and more. Do you have any luxury appliances with new, modern features that make your life easier?

For Bay Area large home appliance repairs, contact Absolute Appliances Repair!

Why You Should Clean Your Dryer’s Lint Trap After Every Use

It’s common knowledge that lint filters, or traps, need to be cleaned out often, but how often? And why is it so important to keep that filter clean? When clothes are dried in the dryer, the agitation and heat cause linens and clothing in there to shed fibers, and this is what is caught in lint screens. The screen’s purpose is to prevent those fibers from obstructing the vent hose. Cleaning the screen is important in order to:

  • Keep Your Dryer Lasting Longer: A clean trap helps the machine work less, so to speak. Any time you take pressure off the dryer, you’ll reduce wear and tear and keep visits from your Bay area dryer repair pro to a minimum.
  • Dry Your Clothes Faster: The only way a dryer is able to do its job is if it has plenty of airflow. A clogged filter is going to reduce the rate of airflow, increasing the length of time needed to dry a load.
  • Keep Your Energy Bills Down: When the lint screen is clogged with all those “fuzzies” the dryer is going to have to work harder to dry your laundry. The harder it works, of course, the more energy it uses and the higher your energy bill will be.
  • Reduce the Risk of a Fire: High temp air is the key factor in how well your dryer does its job, and lint is highly flammable. Getting rid of this Firestarter is important to help keep your family safe from fires.

Should You Really Clean the Lint Filter Each Day?
With so many important reasons to clean your lint trap as often as possible, it stands to reason that cleaning it out each day – even between every single load of laundry – is ideal. Some of the newest machines on the market today have automatic reminders about checking the lint filters. Not all dryers are the same, and a lint trap might be found just inside the door, on the top corner of the dryer near the controls, or even on the dryer’s back wall inside the drum.

Lint can really just be pulled right off the screen; if it’s gunked up and stuck on there, though, just soak the screen in hot water and dish soap for a bit to remove oils and grease. Let it air dry completely before putting it back into its slot. Getting into the habit of cleaning your dryer’s lint filter each day will help ward off the need for San Francisco dryer repair experts to come out and repair a dryer that’s been damaged from a lack of easy maintenance with the lint trap. For more information on maintaining your dryer or any other appliances, contact Absolute Appliances Repair today.

Keeping Your Appliances Safe When Moving to a New Home

So, you’re moving to a beautiful new home and you want to take all those hefty appliances with you. But before you load everything into the truck, you need to make sure that your appliances are ready for the big move. All that rattling around on the road can damage some of your most valuable items like the refrigerator, stove, automatic dishwasher and your washer and dryer. If you’re not careful, some of those big-ticket items might not work properly when you arrive at your new home. Protect your appliances with these moving tips from Absolute Appliance Repair, your local home appliance service company.

Packing Up Your Fridge

Before you pack up the fridge, make sure that you leave it unplugged for at least 24 hours. This gives the fridge some time to defrost. As soon as it’s unplugged, throw out any perishable items and thoroughly clean all surfaces including the bottom drawers, shelves, and the walls. Make sure that you’ve removed all the water from the freezer where large chunks of ice tend to form, unless you want to unpack a fridge full of mildew. Lastly, take out the shelves and drawers and secure them separately before you load the fridge onto the truck.

Clean Out the Stove/Oven

Just like your fridge, start by cleaning out the inside of your oven and wiping down the stovetop. Pack up and clean all the loose pieces, including the racks and knobs. Finally, you’ll need to unplug the stove from the wall. Make sure that the gas has been turned off before you try to unplug the stove. Unless you have experience installing and uninstalling your stove, you should contact the manufacturer or your local gas company for assistance or more information.

Removing the Dishwasher

To start, remove any dishes and the utensil rack. While most dishwashers are pretty good at keeping themselves clean, take a moment to examine the inside. Wipe down the sides, top and bottom if you notice any splashes or stains. Leave the door open and let the interior air dry for at least 24 hours to prevent mold and mildew.

Before you remove the unit, you’ll need to disconnect the power and water supply. Unless you have direct access to the power cord, you can switch off the electrical circuit. Once the power and water have been turned off, disconnect the water supply hose, let it drain, and dry it off with a towel.

Prepping Your Washer and Dryer

Washers and dryers tend to be extremely sensitive. Before you start tinkering with either machine, contact the manufacturer or the user’s manual for detailed moving instructions. You’ll need to disconnect the hoses and pack them in a separate container. The most vulnerable part of the machine is the drum, which is usually located at the back of the washer. Make sure that you’ve secured the drum before you begin handling the machine.

Final Preparations

For all appliances, make sure that all the doors have been tapped shut. Any loose items need to be packed separately or physically tapped to the inside of the machine. Secure all power cords with a zip tie or some tape. If you have any questions along the way, contact the manufacturer or your local appliance home service company for assistance. It’s always better to be safe than sorry when dealing with such large, valuable pieces of equipment.

If you discover that some of your appliances have been damaged in the move, contact Absolute Appliance Repair for all your home and kitchen appliance repair needs!

Common Dryer Problems and How to Fix Them

DIY Tips for Troubleshooting Your Home’s Dryer

Nothing beats the convenience of having a washer and dryer in your own home. Just turn a few knobs and presto, your work is done. But what happens when your dryer goes off the rails? Your clothes come out soaking wet, or maybe your dryer just stops working all together. If you’re having trouble with your dryer, use these tips to see if you can fix the problem yourself.

Dryer Spins But There’s No Heat

Before you examine or tinker with anything, make sure that the dryer is unplugged and at room temperature. If your dryer refuses to heat up during a normal cycle, there’s probably a connectivity issue or something wrong with the appliance’s internal temperature monitor.

Broken Fuse

Now, take a look at the machine’s back panel. You should be able to remove it using a small screwdriver. You should see a small fuse connected to the back. If it appears broken or frayed, you’ll need to replace it with a new fuse.

Checking the Thermostat

You should find the thermometer located on the back panel. Connect an A/C voltage multimeter to the thermometer and you should get a reading of 0. If not, you’ll need to replace your thermostat with a new one.

Checking the Temperature Switch

The same thing goes for the machine’s temperature switch. Remove the top button on your temperature switch and connect the multimeter. Adjust the switch and see if there is any change in the meter’s readout. If not, your temperature switch will need to be replaced.

Dryer Turns On But It Won’t Spin

If the machine turns on, but refuses to spin, chances are that you have a broken belt on your hands. Buy a replacement and open the back of the machine. Remove the old belt and insert the new one. Slide it through the motor pulley until the new belt is firmly in place. If that doesn’t fix the problem, keep troubleshooting.

Replacing the Roller

You should also see a roller underneath the belt next to the tumbler. Take out the roller and inspect it for any damage. Rollers can easily get worn out, especially if your machine is more than 10 years old. Swap out the roller for a new one to see if that fixes the problem.

Replacing the Motor

If you’re still out of luck, you probably need a new motor. In order to replace the motor, you’ll have to pull out the air duct and the blower wheel and then slide in a new motor. You might want to take photos of the inside of the machine before you begin tearing it apart.

Trapped Heat

If your dryer refuses to turn on all together or is getting too hot during a normal cycle, your air vent could be clogged. Empty out the lint trap and inspect the vent. Clear away any debris that might be blocking the airflow.

Taking apart your home’s dryer can be a labor-intensive endeavor. If you don’t feel comfortable troubleshooting such a large piece of machinery, you’re better off calling the pros at Absolute Appliances Repair, offering reliable washer dryer repair to the entire Bay Area, including San Francisco, Mill Valley, Marin County, Novato, and Larkspur.