Energy Tips During the Summer: Save Money and Stay Cool
Summer is a season of high temperatures and increased energy consumption. As the mercury rises, so does the demand on your household appliances, leading to higher energy bills. However, with a few smart strategies, you can keep your home cool and your energy costs down. In this blog post, we’ll share practical energy-saving tips for refrigerators, washers, dryers, and ovens to help you make the most of the summer months without breaking the bank.
Refrigerator Tips
1. Maintain Optimal Temperature Settings
Set your refrigerator temperature to 37-40 degrees Fahrenheit and the freezer to 0 degrees Fahrenheit. These settings ensure efficient cooling without overworking the appliance.
2. Keep the Coils Clean
Dust and debris on the refrigerator coils can cause the compressor to work harder, increasing energy consumption. Clean the coils at least twice a year using a vacuum or brush.
3. Ensure Proper Airflow
Avoid overloading your refrigerator, as it can restrict airflow and reduce efficiency. Leave some space between items to allow for proper air circulation.
4. Check Door Seals
Inspect the door seals for any cracks or gaps. A tight seal prevents cool air from escaping, reducing the workload on the compressor. Replace worn-out seals promptly.
5. Limit Door Opening
Minimize the frequency and duration of opening the refrigerator door. Each time the door is opened, cool air escapes, and the appliance uses more energy to restore the temperature.
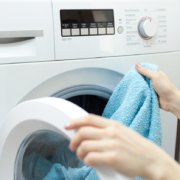
Washer Tips
1. Wash with Cold Water
Using cold water for laundry can significantly reduce energy consumption, as heating water accounts for a substantial portion of a washing machine’s energy use. Most detergents work effectively in cold water.
2. Full Loads Only
Run the washing machine only when you have a full load. Washing fewer loads with more items per load maximizes energy efficiency and reduces water usage.
3. Choose Energy-Efficient Cycles
Use energy-saving or eco-friendly wash cycles whenever possible. These settings use less water and energy without compromising cleaning performance.
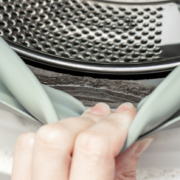
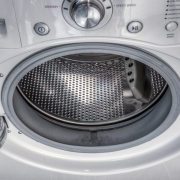
4. Regular Maintenance
Keep the washing machine in top condition by regularly cleaning the drum, filter, and detergent dispenser. A well-maintained machine operates more efficiently and lasts longer.
Dryer Tips
1. Air-Dry When Possible
Take advantage of the summer heat by air-drying clothes outdoors. Use a clothesline or drying rack to save energy and reduce wear and tear on your dryer.
2. Clean the Lint Filter
Clean the lint filter before every load to ensure proper airflow and improve drying efficiency. A clogged filter can cause the dryer to overheat and use more energy.
3. Use the Sensor Dry Setting
Many modern dryers have a sensor dry setting that detects moisture levels and automatically stops the cycle when clothes are dry. This prevents over-drying and saves energy.
4. Dry Full Loads
Like washing machines, dryers operate more efficiently with full loads. However, avoid overloading, as this can reduce airflow and increase drying time.
Oven Tips
1. Avoid Using the Oven During Peak Heat
Using the oven can significantly increase indoor temperatures, causing your air conditioner to work harder. Try to cook during cooler parts of the day, such as early morning or late evening.
2. Opt for Smaller Appliances
Use smaller appliances like toaster ovens, microwaves, or slow cookers for cooking small meals. These appliances consume less energy and generate less heat.
3. Keep the Oven Door Closed
Every time you open the oven door, the temperature drops by about 25 degrees, and the oven uses more energy to return to the set temperature. Use the oven light to check on food instead.
4. Use Residual Heat
Turn off the oven a few minutes before your food is fully cooked. The residual heat will finish the cooking process, saving energy.
5. Regular Maintenance
Ensure your oven is in good working condition. A well-maintained oven heats more efficiently, saving energy and improving cooking performance.
By implementing these energy-saving tips, you can reduce your household’s energy consumption during the summer, keeping your home comfortable and your utility bills in check. Small changes in how you use and maintain your appliances can make a significant difference in overall energy efficiency. Enjoy a cooler, more cost-effective summer!