How to Protect Your Glass Stove from Cracks

Use These Tips to Keep Your Electric Stove Looking its Best

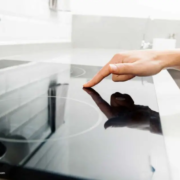
Having an electric stove can be a great way to freshen up the look of your kitchen. These appliances have a sleek, modern look that will suit any interior. Electric stoves are also more energy efficient than gas-powered stoves. Despite their benefits, glass stoves can easily crack over time, which will ruin the look of your kitchen. Learn why glass stoves tend to crack and what you can do to prevent it.

What Causes Electric Stoves to Crack?

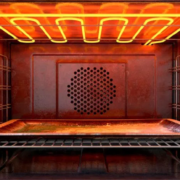
Electric stoves run on electricity. The power runs through a series of coils that lay just beneath the glass. The heat is then transferred through the glass to the pan, so your food can cook. The glass is designed to be durable enough to withstand everyday bumps and nicks, but it can break for two reasons:

  • Damage from Pots and Pans

If you drop or slam your cookware against the glass, it could lead to a fracture. Dragging your pans across the surface can also lead to damage. This can create micro-scratches that reduce the integrity of the glass, making it more likely to crack.

  • Temperature Changes

Your stove is designed to heat up and cool down as needed, but dramatic, sudden shifts in temperature can cause the glass to crack. This is what’s known as thermal shock. It usually happens when you place a scalding hot pan or pot onto a cold burner. The sudden shock can damage the underlying surface.

How to Prevent Cracks and Damage

Now that you know what causes these cracks to occur, you can change your behavior in the kitchen to make sure your glass stove stays intact.

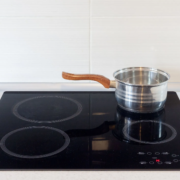
  • Use the Proper Cookware

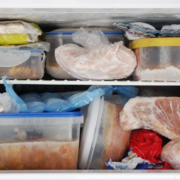
If you are wary of damaging your glass stove, use lightweight stainless-steel or aluminum pots that are specifically designed to work with these types of appliances. The pans should have a smooth, flat bottom to avoid scrapping and chipping. When in doubt, avoid using copper and enameled pots that tend to have rough exteriors. Cast iron and ceramic tend to be extremely dense, so go with a lighter pot instead. Avoid storing cookware and heavy objects over the stove in case they fall.

  • Let It Cool

You should always make sure your heated pots and pans have been allowed to cool before setting them down on a room temperature burner. Put the hot pan on a hot pad or the same burner you just used to avoid cracking the surface.
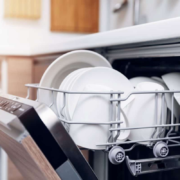
  • Keep It Clean

Not cleaning your burners will only make them more vulnerable to cracks. Be sure to clean off the surface of your stove with a sponge after each meal. Let the stove cool before wiping it down.

Don’t forget to clean the undersides of your pots and pans as well. Food and other debris can cling to the sides, which increases the risk of damage.

Your glass stovetop may stop working all together if it becomes cracked or damaged. Contact Absolute Appliance Repair in San Rafeal to replace your damaged stovetop right away, so you can get back to cooking delicious meals at home.

Why Your Laundry is Damp After Coming Out of the Dryer

Try These Tips If Your Dryer Isn’t Drying Your Clothes Properly

You depend on your dryer every time your clothes are wet. But all that excess moisture might not have anywhere to go. In other cases, your dryer may not be able to remove the moisture effectively, leaving you with a soggy pile of laundry. If you run the dryer again, your energy bill will only increase. Instead of leaving your clothes out to dry, find out why your dryer isn’t doing its job and how to fix it.

Troubleshooting Your Dryer

If your clothes aren’t coming out as dry as they used to, there’s a few things you can try before bringing in the professionals or replacing your appliance outright.

Clear the Lint Trap

You’ll need to clear the lint trap after every cycle to prevent lint from building up inside the machine. The trap is designed to collect all those fluffs of hair and clothing. If the trap is full, the machine may have trouble drying your clothes. Check the slot where the trap is stored to make sure lint isn’t blocking the vent. This should improve the air flow in your dryer, so your clothes can dry faster.

Clear the Exhaust Duct

Dryers generate heat when drying your clothes. They send the excess heat through the exhaust, which is located outdoors. The machine needs air to get rid of the moisture once it has been removed from the fabric. If the exhaust is blocked or clogged, the interior will get humid, and your clothes will still be wet. Clear any debris away from the exhaust vent to keep the air flowing, including leaves, weeds, grass clippings, and snow in the winter. Make sure the vent is pointing away from your home and towards the open air.

If the vent is clear, check the inside by loosening the metal ring that houses the exhaust. Once the exhaust is loose, you should be able to slide it off. Clean out the inside before reattaching for better air flow.

Don’t Overload Your Dryer

You should never put too many wet clothes in the dryer. This could cause the machine to overheat or lead to permanent damage. Your clothes should have enough room to move and tumble as the chamber spins. This is an essential part of the drying process. You can always run another cycle after the load is finished.

If your dyer isn’t heating up at all, you’ll need to consult the professional for assistance. There may be a mechanical failure inside the machine. Certain components may need to be repaired or replaced if the machine is still salvageable. Contact Absolute Appliance Repair in San Francisco to schedule an appointment with a repair expert today.

Is Your Oven Not Getting Hot?

What to Do If Your Oven Isn’t Heating Your Food

Your oven has one job – to heat up, but there are a few things that can prevent that from happening. If your oven isn’t heating up at all or not enough, it needs to be repaired. There’s nothing more frustrating that turning on the oven just before dinner or while baking only to realize that your appliance doesn’t work. Your food may be not heat up at all while you wait around for dinner. Or your food may take longer to took, which will increase your energy costs. Learn why this may be happening and what you can do to fix it.

No Heat

If the oven isn’t getting hot at all, there could be several potential issues.
When it comes to gas stoves, the most common issue is that the gas burner won’t light. The igniter is supposed to start the heating process, but it may get damaged after a while. In other cases, the stove’s gas safety valve may be damaged or disconnected.

The oven may also fail to start if the selector switch is broken. This device changes the settings of the oven based on your selection. It may be sticking or faulty. Replacing the selector should solve the issue.

For electric ovens, the heating coils may not be working properly. Electricity runs through the coils to heat up the interior of the oven. There are two coils, one at the bottom and one at the top. Check to see if the coils are heating up. A warm coil will turn red or orange. If the coil isn’t heating, you can replace it fairly easily. Make sure the oven is off and disconnected from the gas before working on the appliance. You can also call a professional for assistance.

The relays in your electric oven may also be faulty. The relays send the electrical signal to the coils. Contact a repair professional for more assistance.

In other cases, the door may not be closing properly. Some ovens won’t start if the door is ajar. Check the latch and seal for damage.

Not Enough Heat

If the oven isn’t maintaining the proper temperature or not getting hot enough, there could be an issue with the internal thermometer. Ovens use this thermometer to monitor the temperature so it can apply heat as needed.

Electric stoves use internal sensors to regulate the temperature. If the sensor is broken or defective, it may need to be replaced. You can also try recalibrating your oven to correct this issue. With the oven off and disconnected, look for the calibration dial at the back of the temperature dial. It should come with a small screw. Turn the screw clockwise to increase temperature and counterclockwise to lower it. A half turn should change the temperature plus or minus 25 degrees.

Gas stoves use a temperature-sensing bulb to regulate the temperature. The bulb may be burnt out or loose. Check the connection of the bulb and inspect it for damage. You may need to install a replacement or have a professional do it for you.

You should be able to rely on your oven to get food on the table. Contact Absolute Appliance Repair for oven repair in Marin County to find a solution to your problem.

Why Dishwashers Leak and What to Do About It

Is Your Dishwasher Leaking? Use These Tips to Find Out.

Your dishwasher is an important part of your home, but things can easily go wrong over time. Depending on when your machine was made, it could have anywhere from three to over a dozen gallons of water running through it during a normal cycle. That’s a lot of fluid, some of which could end up on your kitchen floor.

You might not realize you have a leaking dishwasher right away. It’s easy to dismiss a small pool of water on the floor, especially if you do a lot of cooking, have small children, or tend to track water through the kitchen. But this could be a sign that your dishwasher needs repair. Learn more about these complex appliances and what causes them to leak.

How Does Your Dishwasher Work?

Let’s start with the basics. Most dishwashers get rid of dirt and grime using water and detergent. Once the cycle begins, water will start to fill up in the basin at the bottom. The machine will then heat up the water and mix it with detergent. Instead of elbow grease, the machine applies pressure to the water to remove the residual food. The spray arms spin as they shoot water at the dishes. All the food and dirt go to the bottom of the basin. The machine drains the dirty water before rinsing the dishes with regular water to remove any leftover detergent. It then drains the second pool of water.

Common Dishwasher Leak Causes:

With all these moving parts, dishwashers can leak for all sorts of reasons. Let’s start with the most common.

Leaking Door

The door of your dishwasher is designed to keep water from leaking out the sides. If the latch isn’t working or the door doesn’t fully close, you may need to replace the latch.

The door also comes with a gasket, or rubber seal, that adheres to the shape of the wall. The rubber may lose its elasticity over time, which can cause water to leak out the bottom. If the seal is damaged or broken, water will easily escape. This is an easy fix. You can replace the gasket yourself or hire a professional to make sure it’s applied evenly.

Leaking Basin

The basin is one of the most important parts of your dishwasher. Everything that goes into your dishwasher runs through the basin, including water, food, dirt, and detergent. All this debris can damage the lining of the basin, causing it to leak. Hard water, minerals, and other hard objects will wear away at the basin. Check the basin for holes and cracks where water can escape. You will also notice water collecting underneath the dishwasher. If the basin is damaged, it’s usually best to replace the appliance all together.

Damaged Valves

The valves the pump the water through the spray arms can also leak over time. You may need to replace one or more of these valves if you notice water dripping down the sides. The drain may also spring a leak if it isn’t connected properly. Check all the connections to make sure they are securely attached.

Overflowing Dishwasher

It’s never a good idea to overfill your dishwasher. This might prevent the door from closing all the way. Overly dirty dishes and large quantities of food and other objects can also clog the drain in the basin, which can lead to flooding.

Using the wrong detergent or too much can also be a problem. This creates too much foam, which can cause the machine to leak.

Don’t ignore the warning signs if your dishwasher needs repair. Contact Absolute Appliance Repair in San Rafeal and Mill County to fix the problem before it gets worse.

Gas Stoves vs. Electric: Which Is Right for You?

Should You Continue to Use a Gas Stove in Your Home?

Electric stoves are becoming increasingly common in homes throughout the U.S. They are more energy efficient than gas stoves and offer numerous health and environmental benefits. However, many people remain loyal to their gas stoves. Learn the differences between gas stoves and electric stovetops to find the right appliance for you.

Gas Stoves

If you have a gas stovetop, you’re probably used to hearing “clicks” before the flame emerges. This can be quite satisfying. You can heat your food in a matter of seconds instead of waiting for the burner to warm up. Gas stoves also heat the pan more evenly, applying direct heat to all sides of the pan. Today, around 40% of homes have gas stoves. Many homeowners have kept their old stovetop for years despite the advantages of going electric.

These stoves run on natural gas. When you turn on the stove, the gas sparks a flame. This releases hazardous particles into the air. Over 90% of gas-powered appliances in California residences emit toxic pollutants such as carbon monoxide (CO), nitrogen oxides (NOx), particulate matter and formaldehyde, according to the University of California Los Angeles (UCLA). Many gas-powered appliances emit these toxins, including water heaters and gas furnaces, but these appliances are connected to the outdoors. Gas stoves releases these toxins into your home, usually with little to no ventilation.

This can be particularly harmful for those with respiratory conditions, including asthma and lung cancer. They can also increase the risk of cardiovascular disease and respiratory illness. Gas stoves release carbon monoxide into the home, which can be fatal in large quantities. Exposure can lead to dizziness, fatigue, nausea, and fainting.

Electrical Stoves

Electric stoves don’t use combustion as part of the cooking process. They run on electricity, just like many of the other appliances in your home. You can use clean energy to power your electrical stove instead of relying on fossil fuels. Electric stoves use thermal conduction to heat up your food. Electricity runs through electric coils laying just beneath the stovetop. This can create cold spots on the surface. The burner will be hottest near the location of the coils, so the pan may not heat as evenly.

However, electric stoves are much safer than their gas-powered counterparts. They don’t release harmful toxins into the air that can affect your health. They also reduce the chances of burning and injury when cooking. You don’t have to worry about accidentally getting too close to the open flame.

Should You Repair Your Gas Stovetop?

Considering the benefits of electric stoves, you might want to consider swapping out your gas stove for a more energy-efficient model if your stove needs repair. You might save money in the long run by reducing your dependence on fossil fuels. If you or someone you live with has a respiratory condition, consider upgrading your stovetop to improve the air quality in your home.

If you choose to keep your gas stove, open the windows as much as possible and turn on the fan to remove these particles from the air. Limit your time in the kitchen when the flame is on to reduce your exposure.

Contact the professionals at Absolute Appliance Repair in San Francisco to learn more about repairing your gas stove. We will walk you through your options, so you can make the right choice for you and your loved ones.

Are Self-Cleaning Ovens Dangerous?

The Pros and Cons of Having Your Oven Clean Itself

Ovens get dirty. That’s just the way it goes. Crumbs, melted cheese, and other food items will often melt at the bottom, leading to all kinds of headaches, including smoke and fumes. That’s why many people choose self-cleaning ovens. They are designed to clean themselves, but there’s no substitute for old-fashioned elbow grease, especially when it comes to caked on stains. These ovens aren’t all they’re cracked up to be. Chances are you will probably have to clean your oven by hand from time to time.

Let’s explore the ups and downs of owning a self-cleaning oven.

How Do Self-Cleaning Ovens Work?

A self-cleaning oven uses extreme temperatures to burn away debris that’s at the bottom of your oven. The appliance usually locks during the process for safety reasons. Most cleaning cycles take several hours to complete.

The oven may reach temperatures as high as 932 degrees Fahrenheit, which reduces most food to ash.

What’s the Downside?

The problem is that simply raising the temperature doesn’t always do the trick. It may even make the problem worse if the food doesn’t simply melt away.

These appliances can also emit a burning smell, which may reduce air quality. The process can produce fumes, usually from bits of food and the enamel lining.

Research also shows that they can increase the chances of carbon monoxide poisoning. CO is an odorless, colorless gas that can put your loved ones at risk.

Self-cleaning ovens have also been known to start fires. Excess grease can easily ignite at extreme temperatures. It’s usually best for everyone to keep clear of the oven during the cleaning cycle.

Tips for Using a Self-Cleaning Oven

If you already have a self-cleaning oven, don’t fret. It’s best to keep the windows open when running the cleaning cycle. Keep the air flowing and use fans to improve air quality. You can even those with respiratory conditions, such as asthma, leave the house until the process is complete.

Keep children and pets away from the oven during the cleaning process, as the front of the appliance will get extremely hot. The glass door on the oven may even shatter.

Watch out for smoke or strong odors. This is usually a sign that something is wrong. Your oven may have a leak, or something may be burning inside.

Do your best to remove stuck-on food and particles before running the cleaning cycle. Use a cloth to wipe up excess grease and food that could lead to a fire. Try to keep your food items covered or far from the edge of the pan to prevent drips and spills.

If you’re having trouble getting rid of stains in your oven, it’s best to hire a professional that can clean your oven for you. They can also assess the appliance for damage to make sure the oven can clean itself properly.

These appliances can help you save time when it comes to cleaning up after a large meal, but they usually don’t work 100% of the time. Be prepared to lift a finger or two in case of a spill.

Contact the professionals at Absolute Appliance Repair in San Rafeal to have an expert inspect your self-cleaning oven for more peace of mind.

Why Frost and Ice Building is Up in Your Freezer (And What to Do About It)

Too Much Ice in Your Freezer? Use These Tips to Keep It Clean.

If you use your freezer regularly, you might notice ice and frost building up on the inside. Ice chips may start to coat your meat and frozen fruits and vegetables, also known as “freezer burn”. In other cases, you might have long icicles hanging from the ceiling. However, all this buildup can make your freezer less efficient. Learn how to get rid of excess ice and frost with these simple steps:

Why is Ice Forming in My Freezer?

Ice and frost form when warm or humid air comes into contact with the cooling coils of your freezer. When the two meet, the coils instantly freeze the moisture in the air. If there’s enough moisture in the air, it will turn into ice. This usually happens when you open the freezer on a hot or humid day. It may also be a sign that you have a leak.

Is It Dangerous?

Freezer burn and frost can affect the quality of your food, but it’s still safe to eat. The packages may look snow covered with small icicles on the sides. Be sure to properly wrap your food in plastic or some other storage container before putting it in the freezer to stop the frost from tinkering with the flavor. Most people say it makes the food taste duller.

As for your appliance, the ice usually makes it harder for your freezer to do its job. It will have to use more energy to keep the contents the right temperature. The extra ice can also damage the cooling coils in the appliance, which can lead to poor temperature control.

How to Prevent Freezer Burn

Store Your Food Properly

Seal your food properly to reduce sudden changes in temperature. Let your food reach room temperature before storing it in the freezer. Try to get rid of as much excess air as possible when wrapping items. Make sure that you’re only using freezer-safe containers for proper insulation.

Adjust Your Timing

You should be able to access the items in your freezer whenever you want, but if the problem continues, it might be best to avoid opening the freezer during the hottest times of the day. Take your items out the night before to let them thaw during the day.

Choose a Quality Freezer

Consider buying a freezer with a built-in defrosting system. The freezer will automatically defrost the interior once a day by turning the compressor fan on and off. Some models even use a small heater to melt the excess ice away. Find a manufacturer with a long history of making quality appliances.

Call a Professional

If these steps aren’t working, your freezer may need a tune up. Put your hand in front of the freezer and see if you feel any cold air escaping through the sides. If the temperature of the air changes, you likely have a leak.

Contact an appliance repair professional in Mill Valley or Marin County to have them inspect the model. They can provide new insulation and repair broken coils. If the freezer is beyond repair, they can help you choose a replacement based on your refrigeration needs.

Everyone needs a working freezer. Contact the pros at Absolute Appliance Repair in San Francisco to make sure your icebox is working properly.